This is what the custom size options screen looks like. Enter your desired width and height, then click "create project".
I have also used the custom size option to print out Avery labels to decorate bridal shower favors and to make custom notebooks at Vista Print. There are so many options out there, check out the print options at the Office supply stores near you, or online shops. If you are a business person, you can create custom notebooks, binder covers, and more. Moms can make all sorts of things for the kids. Chore charts, menu planning, behavior charts, homework charts, and Place mats!!
It was really easy to print the place mats out. We are running low on ink so I had them printed at Office Depot. I save the project to my desktop, then inserted a flash drive into my computer and copied the projects to the flash drive. I took it into Office Depot, and they printed and laminated them for me in about 15 minutes! They offered me standard paper or heavy weight card stock. Because I was going to choose the heavy laminate, I had them printed onto standard paper. If you are going to print both side, the heavier weight option is better. And, after I was there and he offered me the heavier weight, I realized I could have made a two sided project, maybe something for the kids to color on the other side, with dry erase markers? Next time I will make a double sided place mat for sure!! While I waited I browsed the aisle where I found some cute office supplies.
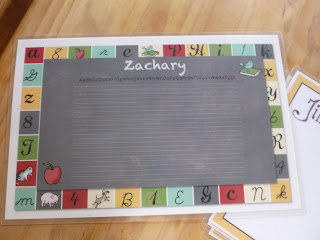
Here are some other place mats that I have made. This one is for Zachary to practice his handwriting.
Thanks for stopping by today! I hope I have inspired you to make some custom sized projects!


Oh, I see all the details now! Thank you!
ReplyDeleteThank you for the reminder about making place mats! I created some for Christmas a few years ago when I was taking a course from Heather Summers - I'm going to make some for this holiday for sure!
ReplyDeleteThese look great! I love all the different ones you have made!
ReplyDelete