 |
photo by Kate Lema Photography |
Thanks for stopping by!!

|
| photo by Kate Lema Photography |


 This is the original sketch. Check out the MDS Monday website! I added it to my Favorites and will be checking back each week to play along!


 are 11 by 17 inches, "Ledger" size. I made them very quickly and then ran straight to Office Depot to print them out and have them laminated. You can also send them online to be printed, but there is an Office Depot right down the street about a mile away, so I just went in, and I had a coupon :)
 Aren't they cute? I had two thicknesses of laminate to choose from and I choose the 10 mil thickness. Very strong but more expensive. They were $1.18 to print in that size, and the laminate was another $4, so just over $5 each. If you go with the thinner laminate, it saves you $2.00.
  To make a custom size choose "custom" in your start up menu.


.jpg)
 |
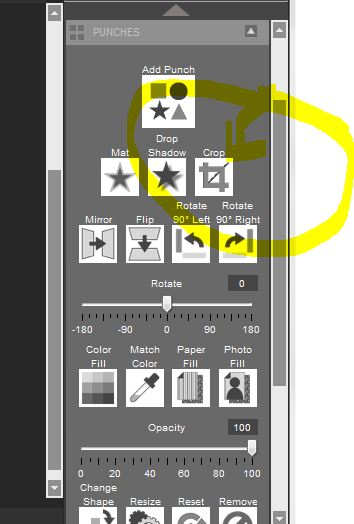 First choose the owl punch and apply him to your page. Next, choose the crop tool. It is on the side bar to the right.
  Next, click on "Crop shape". This will then bring up your punch shape choices. I choose the circle punch.

 Next you need that little thing that hangs off the turkey's beak. The name is escaping me now, I want to call it a gobbler but I know that's not right. Waddle maybe? Anyway, add another owl to your page and select the crop feature. This time you don't need a shape, just move the crop line to the feet area and highlight one of the feet. Click OK. Then color your gobbler (?) and move it over to the correct area on your turkeys face.
  Rotate the gobbler till you like how it looks, then add your heart shape beak and eyes.


 Resize some of your blooms so that they layer nicely. Group them together and add them to your turkey body.


 It was so much fun to carve pumpkins with the kids. This was Jillian's first time. She did a great job and was not squeamish about the pumpkin guts. She said they were slimy but fun. Zachary did the whole thing by himself with child safe pumpkin carving knives. David made a double sided pumpkin with a scary side and a traditional side. They all made a huge mess but it was a lot of fun. I used the toxic frameable stamps for this page, they are just so fun for Halloween. I also used Howlstooth ans Scaringbone paper. The cute frames around the papers were from the free downloads we were given for world scrapbooking day! Love them. And, isn't that font cute? I found it on Pinterest. Here is a link. It was free!


.jpg) I was intrigued by the "That's a Wrap" digital kit that is on sale this week and decided to go ahead and get it. The kit comes with some templates for bows and while I didn't want to use the colors in the template, I printed them out onto some cheap printer paper in grey scale, and then traced the pattern out onto paper that I did want to use. They were very big! So, I went back in and group the elements and re sized them. That worked perfectly. I cut out my new pattern and made my bow. Cute! I put a wooden button in the center and attached it to my box. The template comes with two bow styles.
I was intrigued by the "That's a Wrap" digital kit that is on sale this week and decided to go ahead and get it. The kit comes with some templates for bows and while I didn't want to use the colors in the template, I printed them out onto some cheap printer paper in grey scale, and then traced the pattern out onto paper that I did want to use. They were very big! So, I went back in and group the elements and re sized them. That worked perfectly. I cut out my new pattern and made my bow. Cute! I put a wooden button in the center and attached it to my box. The template comes with two bow styles.  The kit comes with the bow parts as punches as well, so you could paper fill with any patterns you want and print and cut them out all in one step. The kit at regular price may be a bit high priced for what you get, but at half off it was worth while to me, and I'm sure I'll make more of these cute bows!