Friday, March 8, 2013

Happy St. Patrick's Day

I am making some St. Patrick's Day party favors for the Pre-School class.  When making a bunch, MDS is PERFECT!  I could make these cuties with paper and punches, but I want to make 18, so I thought Digital Punches!  YEA!  MDS to the rescue!  
These are the punches that I used.  Half Circle (top of the hat in lucky limeade), Square (resized to small rectangle for hat band in black and slightly larger for the hat brim in lucky limeade) Flower (resized small for the hat decoration in Crushed curry), Wide Oval (for the head in blush blossom), Scalloped Oval (in dusty durango), Five petal flower (cropped for the mustache), Small circle (blush blossom nose), Owl Eyes for the eyes. I like to use the owl eyes because they are already lined up and you can layer the pupils and then resize the group nice and easy.


Here is how I cropped the mustache.  Click on the five petal flower to highlight it, then select the crop button.
 
 
Your flower will appear in a box like this.  You could just drag the crop line over the petals to highlight the area you want, but that made a straight line at the top of the mustasche, and I wanted it curved, so I decided to crop with a shape.  I clicked the "Crop Shape" Button.


When you click "crop shape" your punches will appear.  I chose the Half Circle punch.  If you don't have that one, you could look for other similar shapes. 
The half circle shows up on your flower and you just move it around until the highlighted area is just where you want it.
 
See, now my flower is a mustache!
I then put my little leprechaun together and grouped all the pieces.  I then copied and pasted two more so that there were three on the to of the page.  I then grouped the three together.
The reason I did this is so that I could now just copy and paste a few more groups and not have to do it 18 times, just a few. 


And here they all are!  I then punched them out and added them to a scallop of Lucky Limeade.  I attached them to a bag of gold coin chocolates and added a tag that says Happy St. Patrick's Day from the Teeny Tiny Wishes stamp set. 
I hope you like my project! Why not try some digital punch art yourself?  Email it to me and I will feature it on the blog! 


Wednesday, March 6, 2013

Irish Eyes

There is a challenge at MyDigitalStudio.net to make a St Patrick's Day project.  When I think of St. Patrick's Day, I think of the day I brought home my little Irish daughter, Jillian.  Her hair is no longer so dark, but her little Irish eyes are still smiling! 
The rainbow paper from the background is from the Be Awesome Today download.  The shamrock stamps are from the Lucky You download. I used the color matching tool to match the shamrocks and text to the fun headband on Jillian's head.
Why not try a St. Patrick's Day project and enter the contest too?
Thanks for stopping by!!

Monday, March 4, 2013

MDS Monday challenge 8

I made this page for the MDS Monday challenge 8.  This was a fun layout.  The circles reminded me of  the snowflakes that were falling last week as I started to work on this page, so that is the direction I went with the sketch.  I had to add another photo, since I have 3 kids :)  I copied the background paper for my title and added some punch circles and letters to spell it out.  The challenge was not just the sketch though, it was also to use the "Rip Edges" feature on the photos.  That worked nicely with the snow too!  Don't you love when things fall into place? 
Here is the sketch...


This is the kit I used for the papers...Frosty Day II  #128875 $9.95
 
Thanks for stopping by!!


Friday, March 1, 2013

Another Free Download!!

 
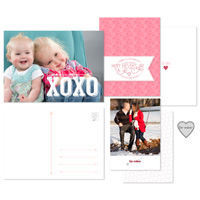
This pretty download is FREE!! Yippie!!  Stampin' Up! reached 200,000 on their Facebook page and released this download free to celebrate!   The download comes with this pretty frameable, but that's not all....
....It also comes with the stamps and embellishments that make it.  Those lovely flowers will be great on spring projects!  The download is item #129889.  Go download your today!!  While your at it, check out Tuesday's new releases, there was a free March Wallpaper download and a download for pocket cards for those of you who scrapbook with the divided pages, totally fun!
Here are the stamps that come with the download.
Go get your today! and sign up for the facebook page too!

Wednesday, February 27, 2013

Jillian's First Day of Preschool

This page is for the progressive challenge at splitcoaststampers.  A progressive page is one where each week a new element is added to the page, usually over 4 weeks.  It's a fun way to make a page, and gets your creativity flowing.  This page is super girly, which is perfect for my girly girl Jillian.  These pictures are from her first day of pre-school.  She was so excited to go to school just like her big brothers.  This page is pretty straight forward for the most part, but I thought I would point out a few things that you may wonder about, for example the broken arrow.  I wanted to make the arrow look as if it were going through the lace heart, so i had to do it in a few steps.


First I opened my stamp folder and did a search for arrows.  I decided on the arrow from the "Pencil it in" download. 
Once you've chosen your arrow, add it to your page and click on the crop button in your design center to the right.
Your arrow will now appear in a grey box
Highlight the area you want to show. click OK and only the cropped part will show on your page. 
Copy that again, but this time highlight the front of the arrow.  done!
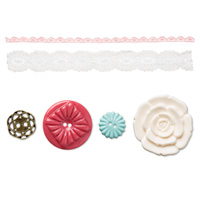
Another thing I wanted to point out is the lace heart.  There are no lace heart embellishments, or if there are I don't have that download, so I had to make my own.   There is a pretty strip of lace in the delicate adornments download, and its a good size to crop. 
Add the lace to your page.  While it is still highlighted, click the crop button, just like you did to crop your stamp.  The grey crop box will appear.  In the center bottom of the box,  you will see a box that says "Crop Shape".  You use this button when you want to make a shaped crop as opposed to just shortening it a bit.  In this case I wanted to make it a shape.  When you click the button, you will get your punches.  Click on the punch you want, in my case the heart punch. 
You can then move the punch around to where you want it on the lace, I centered it on the pattern. You can make the shape bigger or smaller.  I had to make the heart smaller in order to get the whole shape.  Then once it was on my page I was able to make it larger.
Hope all that makes sense :)  Please feel free to ask questions if you have them.
 
Delicate Adornments Digital kit #132265 $2.95
Happy Heart card template #13334 $2.95 comes with two heart themed papers, 8 stamps, 2 embellishments and 3 card templates. This is the paper I used in my flag strip and to fill one of the heart punches.
Fancy Frames download #131330 $2.95
 
 
Thanks for stopping by!


splitcoaststampers

Monday, February 25, 2013

Snow globe!

I saw a cute snow globe idea on the www.mydigitalstudio.net site and I decided to give it a try.  I have to admit that my page is somewhat plain.  I am a less is more sort of person, but it needs something.  I can't decide what else it needs so I am going to just leave it for a bit and get back to it later.  That is yet another great thing about digital scrapbooking.  I can open up my laptop and work on something without dragging out all my stamps and papers and cluttering up my dining room table.  And, I can close it up again when I'm done and go back to it later.  Love it! 
The bottom of the snow globe is actually the bottom of a cupcake punch, turned upside down.  One trick I learned for this page is altering a punch to make a new shape, like i did for the highlight on the side of the globe.  The shadow really helps to give the illusion of a sphere for the glass globe.  Here is how to do it. 
open your punches


Highlight the punch you want to edit, then click "Edit Shape" in the bottom left corner. 
 

You will now get a box that looks like this.  All the little boxes can be moved around to make a new shape.  Play around with this for a while to see all that it can do.  You can even insert more points so make even finer changes to your shape.
 
This is the shape I wanted.


Once you are done and click OK, you will get another small box to name your stamp.  Now it will be saved in your stamp folder and you can get it again whenever you want without having to re-make it.  Cool huh?  This shape is great for highlighting balloons or bubbles or whatever. 
I added color to match the background paper, then reduced the opacity to 30% so that it is just a shine on the glass.
 
The background paper I used is from the "Let it Snow" kit download. 
#132963 $9.95
Thanks for stopping by today!!
 

Tuesday, February 19, 2013

MDS Monday Challenge 7

This is the page I made with the sketch challenge from MDS Monday. The background is from the Nobody's Business download. I thought I needed some bright colors to go with the shirt my husband is wearing. I added Chevrons from the Sent with love download and colored them using the picker tool to match the shirt. I decided that it looks like Rich Razzelberry so I added some Rich Razzelberry brads and a ribbon. The Ribbon was cropped using a punch. Below is a step by step on how to crop a ribbon. 


To crop the ribbon, I added the ribbon to the page.


Next click on the crop button.
 
A new box will open with your ribbon in it.
 
In the center of this new box you will see a button that says "Crop Shape", click on that to access your punches.
 
Pick the punch you want. I chose the Flag from the Grad Party download. 
 
click OK and it will be added to your page.  I tucked it under the photo. 

Here is the sketch from MDS Monday.