Showing posts with label MDS. Show all posts

Friday, August 14, 2015

Sun and Sand

Hi Everyone!  Today I am sharing a page made with a fun kit I bought during a sale at "The Lilypad".  I have learned that Wednesdays seem to be sale days in the digital world.  There are two sites that I know have sales on Wednesdays, "The Lilypad" and "Snap click designs".
This kit was called It's a Breeze by Allison Pennington.  Super cute and fun.  I love the alphabet and watercolor papers. 


Here is my sketch.  I hope that you find some inspiration with the sketch today.  If you use it, please share it with me at my Facebook page, I would love to get some inspiration from you as well! 


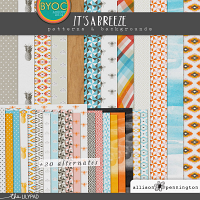
the paper collection
the alphabets
the embellishments and stamps

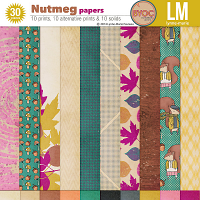
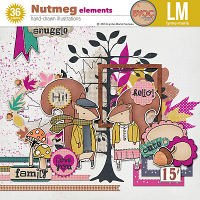
These were all just a few bucks!  check them out or see what is on sale today!

Monday, August 10, 2015

Scout Camp

Hi Everyone!  Let me first say that I know this page is a bit of a mess.  There were just so many photos from camp this year!  I loved that the leaders took photos and send them to us.  As a scrapbooker of an older teen, I don't get very many photos of David these days as he spends more and more time with out his parents. Anyway, the page is a bit of a mess but you should see the clothes David bought home from camp! Wow, talk about dirty!!  I wanted this page to look like a pile of memories and I think I got that. The photos look tossed down on the page but in reality I made sure to not have important parts of the photos covered.   I don't have a sketch for this page because quite honestly it is just a crazy page :)  Crazy cute right?


I used a kit that I have used before called Luv U Smore.  Super cute for those summer time photos or camping pages. You can find it here if interested. The Lilypad.


 Here is an older page I made with this kit.


Thanks for stopping by! 


Thursday, August 6, 2015

Family Tree

One of the most popular posts on my blog has been a Family tree page that I did a few years back.  When I look at my blog stats and Pinterest pins that is the one that still gets the most hits and the post that I get the most emails about.  Unfortunately, since Stampin' Up! has stopped selling digital content, that download is no longer available.  Big frowny face here. :( 
With this in mind, and because I like to start albums with a family tree page, I decided to go in search of a new fun download for Family Trees.  I found this ADORABLE download, "Nutmeg," on a site called "The Lilypad"

There is a bundle that lets you get papers, journal cards and embellishments all at once.  The Bundle was on sale for $8.39 when I bought it, but the regular price is just $11.97, which is a great deal for all that you get. 


or you can buy papers and embellishments separately.
The papers are really nice, and they come in several colors,so you can see the pink tones woodgrain in this photo, but there are really several colors of this paper, as well as several colors of all the patterns, and solids to match.


 There are really cute journal cards too! You can use these in your project life type projects or as elements on the page!


 There is also a free add-on that has leaves with various family titles and a few blank ones to add your own.


 I started on a page that I thought I would share with you even though I have not finished.  I get so many emails about Family Trees that I felt that I would share this right away.  I am going to put photos in the frames and then add some leaves or other details to the page after the photos, just to see what I feel it still needs.
The site were this download is had a lot of sample pages to see so that you can get other ideas for how to use this download.  I love the fall colors in this kit and the pretty leaves it comes with.  I know that I will use it a lot this year. The papers are Beautiful. 


Monday, August 3, 2015

Birthday dinner

Hello everyone!  Today I am sharing a page about my Birthday dinner! 
We went to Benihana.  We hadn't been there for YEARS and we thought the kids would really enjoy watching the chef prepare the food on the hibachi.  It was lots of fun!
I used an old Stampin' Up! download called "spring to life" for the papers and just added some fun flowers to mimic cherry blossoms.  They are from a fun free download from Sahlin Studios called "So Grateful".  
If you haven't already, be sure to check out Sahlin Studios.  They have so many really cute downloads and lots of freebies too.  And if you like her Facebook page you get a free kit that is also super cute!  So Grateful I found that site!


 Here is my sketch.


 I had a lot to journal on this page and I thought it would be nice to go around the photos, just like I would if I were writing on a traditional page.  To do this I just make my text box go over the area that I want to write in, going right over the photos. 


 Next, as you are typing, be sure to actually hit enter after each line, to keep them were you want them.  Sometimes lines have a habit of shifting a bit if you don't do this.  Also add your spaces when you get to the photos or embellishments, in my case the flowers.  Some times it helps to just type it all out, get it the size you want, and then add your "enter" and "space"keys were appropriate.


Hope you like today's sketch!  If you make a page with it, I would love to see it!  feel free to share it on my Facebook page!

Monday, July 27, 2015

A pretty mess

This page is pretty messy.  Sequins and flowers everywhere!  And that is just what my dinning room table looked like after our crafty time,  so I figured it was perfect!
I found a fun kit by Lauren Grier at Sweet shoppe Design.  It is called #happy and it has so many fun happy elements!


Here is my sketch.  Its a fun one when you have a lot of photos.  Think of the other possibilities besides flowers.   Have a beach page to do? use some waves or fishies instead of sequins and flowers. Or leaves for a fall page, snowflakes for a winter page, you get the idea.


Here is the #happy kit I used.  You can get it here.    
It was on sale a while ago for $4.79 but I am not sure how long that sale is on.  Regular price is $7.99 which I think is still a good deal, there are 18 papers and a ton of embellishments.  Perfect for my Happy little daughter!   

Wednesday, June 24, 2015

Silly Squirrel

Hello everyone!  I have another page to share this week.  This one is of a crazy squirrel that wouldn't let us leave the dentists office.  Unfortunately, I think the little guy was a bit too used to people, and I didn't see his mother anywhere.  We had to throw granola into the grass to get it to let us drive away.  The kids wanted to keep it of course.  It was adorable but I told them it was best to leave it be.  I was tempted to let it roam in our neighborhood but I was hopeful it still had a mom of its own and we left it.


This layout is super simple and I thought it was good for a page that I wanted to really focus on the story and pictures.  You can easily dress the page up or down with your papers and make it elegant or childish.  Fancy or silly with different frames and fonts. 


Thanks for stopping by!  If you would like to share a page you have made with this layout, add it to the comments at my Facebook page, I would love to see what you've done with it! 


Monday, June 22, 2015

Sketch #4 BOOM BOOM Balloon

Hi everyone!  I have another page for you.  This one is pretty plain and simple.  No papers at all, no embellishments.  There is a lot going on in the pictures and I couldn't decide on a paper or anything and so I just used the fun action bubble stamp from "Calling all heroes" all added free form lines as a background.  I kept intending to add more, but every time I did I didn't like it.  If you use the sketch perhaps something will work differently with your photos and you can add more to your page, but I think I like this one as it is.


Here is the sketch.  Show us what you created at my Facebook page.


 Follow my blog with Bloglovin

Wednesday, June 3, 2015

A litle inspiration to hang on my wall.

Hello digital friends.  I thought I would share a print I made today to hang above my work space. 

I have made similar things with this background before and I love to use it again and again, one of the wonderful things about digital. 


It starts with a background of some sort of newsprint.


Next look for stamps that look like watercolor and add them all around the page.  You can change the opacity on some if you wanted.


Next add your desired stamps. 


Next open the free form tool and add a wash over the stamped images.  I made the opacity about 75%.


Now send your white wash layer back behind the stamps and print it out.   I printed on watercolor paper that I trimmed to 8 1/2 by 11 so that it would fit in my printer. 


Next I watercolored the stamp images with Aqua Painters and ink.  I also printed out some text to add to the print out. 


Hope you give it a try!!

Monday, June 1, 2015

Sketch #1 Neighbors and Friends

Hello everyone!  here is a new sketch for you.  My kids have been playing outside non-stop since the beginning of may and I am so happy that they have lots of fun friends to play with all right in their backyard.  From age 14 to 6  they all play nicely together, for the most part, and stay out till we force them in for bed.  I hope it lasts till school starts again in August!  I had great friends right next door and across the street when I was growing up and I always remember playing kick the can and ghosts in the graveyard all summer long.


Here is the sketch.  Hope you give it a try.  Thanks to those of you who have been sharing your pages on Facebook!  I hope to see more!!

Tuesday, April 28, 2015

Selfies!

I am playing along with the Project Life x Stampin Up Trio challenge, PLXSU Trio Challenge.  This is a fun new challenge group that uses the Project Life line by Stampin' Up! It was started by my MDS Blog Hop Friends and I intend to mostly use their challenges with my paper Project Life packs, but sometimes I will use my digital versions as well.  I am glad that Stampin' Up! has released the Project Life line in digital format, and we were told that they would continue to release them digitally through the Becky Higgins Project Life site.  This week the challenge was Selfies!  I had a fun bunch of photos that I found on my phone of Jillian taking selfies.  Too Funny!  It was quite a surprise to see them on my phone, I didn't know she could figure out how to do it!
Here is a link to the challenges at PLXSU Trio, I hope you will find some inspiration to help you get some fun pages done, whether digital or traditional!

Wednesday, April 8, 2015

Backing Up your MDS files

As most of you know by now, Stampin' Up! has decided to stop supporting My Digital Studio after May 31st of this year.  While this does not meant that you can no longer use it, it does mean that if you have a problem with it, you will not be able to get assistance. Tami at MDS Monday had been working on making some videos to help you back up your software and downloads.  You can view them at the MDS Monday blog under the Video's and How to's tab.  

For those of you with MDS who love it like I do, here is my plan.  I am going to back up my files just in case. Then I am going to continue to use it as I have been for a few years now.  I looked into some other software and found that there is a lot of good stuff out there, but since this is working for me, I am not going to get rid of it just yet. 

When the time comes, and I need to switch, I plan on switching to the My Memories version 6.  here is a link.  The My Memories company is the company that made MDS for Stampin' Up! and works most like MDS.  There are a few issues though.  They do not have the same print options that Stampin' Up! does.  For example with MDS you can make a card and then choose to print 4 to an 8 1/2 by 11 sheet, or you can choose to print two to an 8 1/2 by 11 sheet, cut in half, or  you can print one to fold in fourths.   Also, My Memories does not have Stampin' Up! colors pre-programed, and as I like to make hybrid cards, that is important to me.  However, there are work arounds for all the issues.  Another Stampin' Up! demonstrator Janine Tinklenberg has make a list of all the Stampin' Up! colors and their RGB codes , You are wonderful Jan!! I will add them to the bottom of this post. 

In the mean time, I will keep on creating wonderful pages in MDS and see how it goes.  Be sure to check into backing up your files just in case!  And I plan to keep on posting pages and sketches here and I'll see if that is helpful to anyone. 

I am working on compiling a list of printing options for the MDS Monday site and I will keep you updated on that as well. 


Monday, April 6, 2015

MDS Monday 106

Hello everyone!  I am late posting my MDS Monday page today!  I did not feel well this morning and spent most of the day in bed. :(   Which reminds me of another great thing about digital scrapbooking!  You just need to open the laptop and create away!  I say this because my craft room is an absolute mess right now! 
Anyway, onto the page.  Tami has a fun sketch today and wants us to focus on our journaling.  I have to admit that I was a bit wimpy in my journaling here, but I am going to think on it a bit more and add some text later before printing.  This is my daughter at ballet class.  She really enjoyed dancing with the scarves.  They were pretending that they were blue birds at Aurora's wedding in sleeping beauty.  She and her friend Emily really got into it.  Aurora is one of Jillian's favorite Disney characters. It may have more to do with the pink dress than the story though :) 
Here is the sketch!  We hope that you will play along with us this week.  click here to get to the MDS Monday site and see what the rest of the team has come up with. 

Thanks for stopping by!

Saturday, April 4, 2015

Adding Text around a corner


Last week we had a challenge at MDS Monday that had us journaling around the page using the free form tool. A few people have asked about how to get the text to go on the outside or inside of the line.  I found this old post that shows a few examples of how to make the text do what you want.  Here is a link to the old post.  I show you step by step how to get the line you want and how to get the spacing right so you don't have your words cut in half as they make the corner.  Hope that helps!  Let me know if you need any more help, or any other MDS questions!

Friday, April 3, 2015

Digital Easter Cards

Hello Everyone!  I have some last minute Easter cards that I made yesterday in My Digital Studio.  I loved the stamp "Blessed Easter" and so when I saw that it was available in digital form I just had to get it.  I look for digital stamps that would be great for use with Aqua Painters or other coloring tools.  When I heard that Stampin' Up! was going to discontinue MDS, I started looking through the stamp brush sets for other digital stamps that would be great for coloring.  I haven't yet found a new place for digital stamps, so I am making a wish list of Stampin' Up! stamp brush sets to get in case there is a last minute digital sale.  A girl can dream right? 


 I love digital stamps for coloring because I can enlarge or shrink them to fit my needs.  I made a sheet of stamp images and printed them out.  I have a printer that allows me to print on thicker paper through a special slot in the back. It can only do one sheet at a time and will print on my Whisper White cardstock and even watercolor paper. I printed one of each (Whisper White and Watercolor) for my Easter cards.


I love digital stamps because you don't get any accidental inked edges or blurry lines.  And I can use the Coloring tool to make some of the stamp image black, and some green as I did with this stamp. I could even have cropped off the sentiment and just used the tulips. 


I used my markers to color the images on the Whisper White paper.  I used Pink Pirouette on the tulips.  If you let an area dry and then go over it again, you can get some darker tones to get a richer look to your coloring.


I used my Aqua Painter to color the tulips on the Watercolor paper.  This is my favorite way to color.


I cut out all my images and used various scraps of paper to embellish card bases. I challenged myself to only use scraps on these cards, with a solid base of course. 


I love linen thread and so I had to add some of that to my cards as well, 


Thanks for stopping by today!