Friday, August 31, 2012

Hexagons

This is another fun page from Heather's My Digital Studio class.  I have to say it, I love her classes and they really help me to get some pages completed.  The class started Aug 20th, but you get access to the online class blog for 6 months, so you can join anytime.  So worth the money. 
Anyway, on this page she taught us how to create the hexagon background really fast, and how to add the color to the hex punches faster too.   We added 3 or 4 hex punches to the page, arranged them, then turned them into a group.  Once  you have your group you can copy and paste the group as many times as you like. 


Here are my 3 hex punches.


Here they are grouped into one.


Here they are copied and pasted.
 
Heather adds a page and a how to video each day.  
Hope you like my page!

Thursday, August 30, 2012

Turning 2

This is one of my favorite pictures of Zachary.  He has a very cute smile and I love his dimples.   I always take the kids for pictures on Christmas and their birthdays (until they are old enough for annual school pictures, then just Christmas).  This picture is from Zachary's 2 year old pictures.  He was a very good model for the photographer and there are a lot of great pictures, but this one is my favorite.   The layout comes from the class I'm taking from Heather Summers.   While I think I am actually getting pretty good at My Digital Studio, I still learn something every day of class.  Heather is full of tips and tricks, and fun page layouts.  Thanks Heather!

Wednesday, August 29, 2012

Brothers

It truely makes my heart smile when my boys are so good to each other.  Despite their age differences they play together and get along pretty well almost all the time.  David is such a good big brother.  Since the day Zachy was born, David has always been looking out for him and trying to show him the world.  This page celebrates those feeling.  I remember walking David to school and Zachary wanting to hold his hand.  David walked and talked to him the whole way.  I grabbed my phone and snapped some pictures before the moment passed.

This page also uses a new MDS2 feature, texting on a free form line.  I love this new feature!! 
Check out this video for a how to.

Tuesday, August 28, 2012

Family Tree

Nov. 2015 update.   This has been discontinued by Stampin' Up!  See this post for update on where to get template. http://bethsdigitalcuts.blogspot.com/2015/10/family-tree-template.html


Isn't that a cute Family Tree?  I think so.  I plan to make it the first page of my children's scrapbooks.  Since I made it digitally, all I have to do is change the text box in the oval frame to the next child's name, re-save, and I'm done!  This page is actually a "frameable Designer Template" from Stampin' Up! so  I can't take credit for the cuteness.  And, even better, Its on sale for only $3.42 now through September 14th, 2012, when you purchase through a demonstrator.  Hey, I'm a demonstrator : )   Check out all the sale downloads here.   This template is all made out for you, but that doesn't mean that you can only use it as it is here.  Each element also comes separately too.  The little brackets can be used on so many projects as labels and tags.  The little birds are super cute for many uses, so are the heart flowers.  And the tree is cute too!  The grass at the bottom is from a separate download, you could leave that off, add some cute patterned paper, or buy the other download too :)  (celebrate any day download #127757 $9.95)


Here is a card I made using the template.  Cute right.  Good for an anniversary or Valentine's Day.   You could put apples in the tree or flowers.  Change the leaves to fall colors.  Lots of possibilities.


Click here to go to the Stampin' Up store to see the download.


Thanks for stopping by!  Check out the other On Sale Downloads at my Stampin' Up! Website.  Click the Shop Tab under my blog header.

Monday, August 27, 2012

Copying a Sketch and using a new feature

I remember this day so well.   Jillian was so happy to sit and play with her toys all by herself.   Hard to believe this is my Jillian.  Now she is three and a total wiggle worm.  She just can not sit still for a minute. 
I was recently turned on to a website that has free scrapbook sketches and  I used one of those sketches to make this page.
The color combination was for, you guessed it, a challenge from SplitcoastStampers!  I know, most of my posts refer to challenges from this site, but I have to tell you, this is a good way to jump start you pages.  Every once and a while a challenge just doesn't work for me, and so I skip it, but most of the time I really like what I end up making.  And when I get my finished pages back from the printer, its like Christmas!  They look so pretty all printed out. 
The papers and embellishments for this page are from the "One Great Year" digital kit.

This kit comes with papers, some stamps, ad lots of embellishments, including lots of elements to make Calender pages.  The colors are pretty too, Basic Grey, Pear Pizazz, Elegant Eggplant.
I also used a new feature of MDS2 on this page.  There is a new feature that allows you to attache a text box to a shape, such as a punch.  On this page I made a text box of journaling and attached it to a circle punch, then put it in the center of the medallion.   You can also use this feature to attach text to a free form line, like a did a few posts ago on a balloon string and to make a butterfly trail.   
Watch this video to see how to do this for yourself!

Friday, August 24, 2012

Happy Birthday Ben!

Today is my husband's birthday!  I recently came across a picture of him that I took just after we met, a long time ago!  here it is!  Wow, look at that hair!!  Happy Birthday Ben!!

Wednesday, August 22, 2012

Progressive Challenge task 3

If you were here last Wednesday you saw this page, minus the journaling and the title.  This is a "progressive" challenge.  Each week we are given a task to add to the page, and at the end of four weeks we have a finished page.  This challenge can be found in the challenge forum at Splitcoaststampers.  If you want to play along, you can do all the past tasks at one time, its all just for fun. 
What do you think of the cute font?  I love it.  I found a blogger that posts some of her favorite font finds from the Internet, most free, and I have downloaded several of them.  This one is really cute and I thought it worked nicely with my page.   I linked the blog above, so check it out, cute stuff, not just the fun fonts! And, in case you are wondering, all the elements on this page are from the Bandstand Kit from Stampin' Up! (of course).  This kit has fun papers and even more fun stamps and embellishments!  Love it.  The balloon in the top right corner is from this kit too. 
Next week is the last task in this challenge, then my page will be complete!
$7.95 for this kit!  Great Deal!  all the papers and stamps and embellishments!
Thanks for stopping by!   Come back next week and see my completed page!

Tuesday, August 21, 2012

GO GO GO!

I am once again taking an online class from Heather Summer.  She is an excellent MDS teacher!  I have done two of her classes already, so this is the third and I can't wait to learn all her tips and tricks.  Here is a link if you would like to try it too.   Class started yesterday and goes for 30 days, but you have access to it for 6 months, so if you can't actually do it each day, not to worry you can finish at your own pace.   This page is from our first lesson on the free form line tool.   There are still some glitches with this tool I've noticed, but Stampin' Up! is working on them and we will get an update to fix them soon.  I was able to get mine to work for this page though :)  I used the free form line tool to add the baseball stitching to the background.  Another trick she showed us was to copy and paste duplicate photo's on top of each other for a action looking effect.  Heather posts how to video's and sample projects each day.  There is also a gallery for us to upload our "homework",  as well as a forum for us to discuss what ever we want to discuss.  Definitely worth the price. 

Friday, August 17, 2012

Some Card Fronts

I needed a few cards this week, and I decided to do them in My Digital Studio.  I thought I would show you what my project looked like on the computer, then finished.  I like to do hybrid projects. I feel they still look handmade if I add a button or ribbon or something, and I like the added dimension.    When I make cards I prefer to make them as card fronts, and if I know I need a few, I try to make them all on one page.  If I am just doing outsides, I can get 4 on a page, or two if I am going to add customized inside too.   Here is how my project looked today.  Four card fronts on one 8 1/2 by 11 page.  I then printed the page onto Whisper White cardstock, then mounted each card onto co-ordinating cardstock.  Once that was done, I added my real embellishments to finish the cards.


 Did you notice some of the new MDS2 features?   On the Butterfly card I used the new free form line to add text in a wavy line to look like a trail from the butterfly. I also used the coloring tool to add multiple colors on my butterfly.  Super Fun!   I forgot to get rid of my "bleed area" when doing a screen capture image, so ignore the shaded grey area on the side of the card, its not there on the actual page :)


One of the Balloons on this page also has a free form text line as the string.


The boat card uses the stamp coloring tool like the butterfly card.
I will be teaching the stamp coloring and free form text line at my upcoming MDS2 class.  If your in the area, contact me for details.  If you are not in the area, no worries, I can find some video links for you to view if you would like to learn more.


Here they are all printed out and attached to my card bases.  I've added my real embellishments and I think they look great!


This card is all flat except the brads.  Doesnt it look layered?
Here is the wavy text line up close.

Wednesday, August 15, 2012

Use your stash challenge and new MDS2 feature

One of the challenges this week at splitcoaststampers was a "Use your stash" challenge.  This challenge was to use that digital kit that you just had to buy, but then never used.  I think the biggest challenge for me was choosing which one :)   I am a bit of a download junkie.   I do love digital kits.  I love how the papers and stamps and embellishments all co-ordinate to make a perfect project.  I finally settled on the Playful Polka dots kit.  This is such a fun kit.  It comes with lots of embellishments in fun bright colors.  I thought it was a perfect kit for my Grandmother's Birthday pictures.  A few weeks ago I featured a page from her 91st birthday, and here she is at 94.   Just about everything on this page is from the kit.  I added punch numbers from "timeless type" and filled them with papers from the kit.  I also added some rose red buttons and a bakers twine bow.  I used one of the new features of MDS2 to add the bow.  The embellishment crop feature is a really nice addition to mds.  On this page I didn't want the bows tails to be so long, and they are quite long in digital form I think.  In the past I would resize the bow to make it shorter, but this would also make the whole bow smaller, not just the tails.  With the new crop feature you can cut an embellishment any way you like.  Just highlight the embellishment, and click the crop button.  You will then get a worksheet looking page with your embellishment on it.  You then drag a crop box over the image in the area you want to use, and the crop feature will get rid of any parts you did not highlight.  Hopefully the picture below will help this make sense.  Once the kids are back in school I hope to teach myself how to make a screen capture video to show you this step by step.
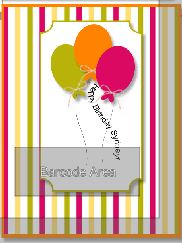
While I was at it, I thought I would make a matching Happy Birthday card.   I'm not sure who for, but you can always use some extra Birthday cards.  The way I like to make card in My Digital Studio is to make a card front.  I open an 8 1/2 by 11 project page, and create a card front by adding a punch, resized to the size I want my card, minus 1/4 inch all around.  In this case I took a half an inch off all around, so my punch was sized to 5 by 3 3/4 inches.  Once I print out my card front, I will mount it onto a piece of matching card stock.  In this case, Rose Red.  I create  my card front in the punch area, building up my layers.  I try to think of what i want to add as a "Real" layer as I'm creating my digital card.  I like to have something real on my digital cards, I want them to have some actual dimension.  In this case, I pictured a button at the side of my Happy Birthday pennant.  Once I have my card front done, I sometimes group all the elements together and then copy and paste three more on my 8 1/2 by 11 paper, so I end up with four all the same.  I didn't do that this time for some reason.  Here is what my page looked like. 

I then printed out my page and cut out my card front.  I mounted it onto my Rose Red card base, and added the button and bakers twine. 


So, go use one of your digital kits and see what you come up with!

Tuesday, August 14, 2012

Digi scrap challenge


Tuesdays are great days for Digi Scrap lovers like me.  Each Tuesday Stampin' Up! releases new digital downloads, today's were awesome!!  And, each Tuesday my other favorite site has a digital scrap challenge!  The scrap challenges are a great way to get yourself started on a page.   This is week two of the monthly progressive challenge.  The progressive challenges give you a task to do each Tuesday of the month, then by the end of the month, your page is done. 

The first week we had to choose a background paper, add another background layer, then a border of some kind.  My choice was to use the new Bandstand papers, these are great colors and papers for kids, but they are not primary tones, so also great for other types of pictures as well.  I added the darkest pattern for my background, then added a square punch resized to 11.5 inches and paper filled it with a lighter pattern from the same Bandstand kit.  Next I added yet another punch square, resized to 11 inches, and color filled it with Pool Party.  I added a stamp overlay border from the Days to Remember hostess kit resized to 11 inches and colored whisper white at 50% opacity.

For week two we were to add 7 or 8 boxes to our page, filling at least 3 with photos and the rest with paper.  Then we were to add shadows to our boxes.  I just realized that I only added 6 boxes, oops! :)

There is also a separate non-progressive challenge each Tuesday too.  I haven't gotten to that one yet, so check back soon!

Here is a link to the challenges, why not play along?  You can go back and do past months progressive challenges all at once, or try out one of the other challenges. 

Check back next week to see how the progressive page is going.

Monday, August 13, 2012

New Friends

Do you ever have a hard time getting started on a scrapbook page?  I do.  I have so many pictures I want to put to pages, but it is just hard sometimes to figure out how to lay them out.  One of my favorite ways to get started is with a Challenge.  There are a few places that have scrapbook challenges and card challenges.  My favorite place is www.splitcoaststampers.com .  They have different challenges each day and some monthly challenges as well.  This page was inspired by a "Creative Crew Challenge".  The Creative Crew Challenges focus on Stampin' Up! products, so they work great for me.  This was a sketch challenge.  The theme for the month is friends.   If you are looking for a starting point for your pages, try out a challenge! 
This page celebrates some of the friends my son made at school.   I can't believe that my children are going back to school in just one week from today! WOW! Summer flew by!  I used background paper from the storytime CD, and the film strips are from "more candid frames".  
Lots of downloads are on sale this month, and print products too!!  Sale ends August 31st! Check out my online store for details, or as always, feel free to contact me!

the sketch

Monday, August 6, 2012

Stitched Wreath

I am really enjoying the version 2 of My Digital Studio.  Stampin' Up! has made a great program even easier!  This page used one of the best new features, Layer Manager.  I have A Lot of punches on this page, and lots of layers.  I changed the layers of my leaves many times.  In the original version of MDS, I would have been clicking "Send Backwards" or "Send Forwards" countless times.  Now, with MDS2, I can click the layer button and chose to do it the original way, ok if you only have a few layers, or the new way by viewing a list of all your layered components and click and drag them into what ever arrangement you want.  Here is a screen picture of what that looks like.  A drop down list will appear, and you click on the element you want to  move, drag it to the new location, and your done.   YEA!!


I hope you like todays project! In case  you are wondering, the papers used in this project are from the Comfort Cafe digital content CD, and the leaf punches are from the Wonderfall digital download, released August 1st.

Saturday, August 4, 2012

What are the new features?

Well, MDS2, My Digital Studio version 2 for those unfamilar with "MDS" (GASP!), is here and it is loaded with features.  Here is a list of the upgrades for those of you seeking details. 

1. LAYERS PALETTE: Quickly manipulate and edit project layers

2. EDIT OBJECTS OFF-CANVAS: Rotate, resize, and manipulate items that extend beyond the canvas

3. UNLOCK INDIVIDUAL OBJECTS: Right-click object to unlock

4. CUSTOMIZABLE COLOR PALETTE: Organize colors swatches to create a customized Color Palette

5. WATERMARK OPTION: Change the color to white and opacity to 10% with just one click

6. SUGGESTED COLOR COMBOS: See expertly coordinated color combo ideas in the Color Palette

7. DESIGN IN SPREADS: Design on two pages, side-by-side

8. FULL WRAP COVER: Design photobook front/back covers and spine at the same time

9. CUSTOM CANVAS SIZE: Create a project in any size up to 24" x 24"

10. CROP STAMPS: Show off part of the stamp image and hide the rest

11. CROP EMBELLISHMENTS: Show off part of the embellishment and hide the rest

12. BRUSH TOOL: Create freehand art with different brush sizes and shapes—perfect for line art

13. LINE TOOL: Insert and manipulate lines with curves and custom paths

14. ERASER TOOL: Easily erase freehand brushes

15. VECTOR STAMP BRUSH IMAGES: Resize vector stamp while keeping its image crisp

16. GLOBAL SEARCH: Simultaneously search for all content types

17. FILL PUNCH WITH PHOTO: Easily add a photo to any punch shape

18.FILL PUNCH WITH CARD STOCK: Add card stock (and textured card stock) to punches

19. CUSTOM GROUPS: Save custom created groups to import on other projects

20. ENHANCED PAGE LAYER EDITING: Resize Designer Series Paper on the canvas and maintain pattern

21. SMART OBJECT ALIGNMENT: Align objects with mat consideration

22. CHANGE PUNCH SHAPE: Change punch to another punch shape and maintain filled pattern

23. EDIT OBJECT SHORTCUT KEY: Edit objects with a shortcut: CMD/CTRL+

24. ROUND PAPER CORNERS: Round any corner of Designer Series Paper and card stock

25. ROUND PHOTO CORNERS: Round any corner of a photo

26. PHOTO FILL GROUPED BOXES: Group photo boxes and fill with one photo

27. INTUITIVE iPHOTO INTEGRATION: Access and use photos on a Mac more easily

28. PROJECT SIZE CONVERSION: Easily change any project to a different size

29. RECOLOR EMBELLISHMENTS: Monochromatically change the color of an embellishment

30. RECOLOR DESIGNER SERIES PAPER: Monochromatically change the color of layered Designer Series Paper

31. MIRROR/FLIP GROUPS: Reverse and flip a set of grouped objects

32. MIRROR DESIGNER SERIES PAPER: Mirror and flip backgrounds and layered Designer Series Paper

33. DIGITAL STITCHING: Add stitched line—choose from several stitching styles

34. SUPPLY LIST: View a list of items used on a page

35. SMART GUIDES: Drag guides from the ruler to your project for perfect alignment

36. EXPORT TO PDF: Save your project as a PDF file

37. EXPORT TO PNG: Save your project as a PNG file

38. EXPORT TO SVG: Save your project as an SVG file for use with an e-cutter

39. TEXT IN COLUMNS: Type text in columns

40. TEXT TRACKING: Increase/decrease the horizontal space between letters

41. TEXT SHAPES: Add text to any punch shape

42. TEXT ON A PATH: Add text to any line style to create your own curvy verses

43. MIRROR TEXT: Choose a mirror text option for use on iron-on transfers

44. OPEN FONT TEXT: Enjoy open type font capabilities

45. TEXT JUSTIFICATION: Justify text left, center, right AND top, middle, bottom

46. FONT SEARCH: Find a font by typing the first few letters

47. CHANGE TEXT CASE: Quickly change text to upper or lower-case

48. CHANGE ALL TEXT IN PROJECT: Apply font settings to all text in a project

49. DESIGNER TEMPLATE SELECTION: Browse all designer templates in one location

50. ENHANCED PROFESSIONAL PRINT: Choose and preview all print options within the software

51. ENHANCED SAVE PHOTO LAYOUT: See mats, shadows, and punches in saved photo layouts

52. BACKGROUND PHOTO: Quickly add a photo as a background

53. ADD MULTIPLE ITEMS: Simultaneously add multiple elements from the Design Center

54. CALENDAR EFFECTS: Apply settings to all Design Center calendars in a project

55. CHANGE LAYER OF SELECTED OBJECTS: Move multiple selected objects forward and backward without grouping

56. RECOLOR PHOTO: Monochromatically change the color of a photo

57. STAMP IMAGE COLORING: Add more than one color to a single stamp image

58. EXPORT PROCESS: See all export options on one screen for a simplified experience

59. ENHANCED PHOTO DRAG & DROP: Drag and drop a photo onto a photo box in any layer

60. BATCH PHOTO EFFECTS: Apply photo effects on selected pages

61. DELETE PROJECT PREVIEW: Show project preview before you hit delete

62. USER INTERFACE UPDATE: Enjoy a sleek new look and feel–easy on the eyes

63. DEFAULT BLEED AREA: Use bleed area defaults that are specific to project type

64. ZOOM TOOL SHORTCUTS: Get to the zoom tool with a shortcut

65. SPLATTER TOOL: Add splatters of color in different sizes

Coming Soon: When these features are good to go, we’ll let you know on MyDigitalStudio.net so you can update your software (Help>Check for Updates).  
66. INTUITIVE PRINT FROM HOME: Print from home more easily

67. QUICK PRINT TEMPLATES: Print from home "quick print" templates

68. CROP PUNCHES: Show off part of the punch and hide the rest

69. CROP ON EXPORT: Save a cropped portion of a project

70. POP-UP INSTRUCTIONS: Get pop-up instructions for specialized templates

71. PAPER RIP OPTION: Create torn edges with Designer Series Paper and card stock

72. ENHANCED THUMBNAILS: Enjoy improved thumbnail images in the Resource Palette preview

73. PHOTO ROTATION: Rotate your photos within the ―Crop Photo‖ tool

74. ARTWORK ORGANIZATION: Customize artwork organization in the Design Center

75. IMPORT FROM OTHER PROJECT: Toggle between projects to import elements onto current project


OVER 75 NEW FEATURES, What else can you find?


Thursday, August 2, 2012

Great new feature of MDS2

So, I've been playing around with MDS2 a bit tonight and while there are a lot of great new features, one of the features I am enjoying the most so far is the new ability to re size ANY size project.  With the original MDS, you could re size a 12 x 12 into an 8 x 8 or 5 x 5, but that is it.   A square needed to stay a square.  And, when looking at your pre-made templates, you had to click on a project and choose a size, then you could see what templates you had.   Now, with MDS2, when you want to look at what templates you own, you can click on a button called "Designer Templates"  and you can scroll through ALL of your templates, card templates and page templates, everything in one place.  And, this is great because now you can re size a 12 x 12 page into a 8 1/2 by 11 or even a greeting card.   Some tweaking may be needed, but the essence of the template says intact.  For example, if you re size an 8 1/2 by 11 landscape into a 12 x 12 page, you may want to re space some things, or add a few things, because the page is larger.  Here is an example.  The first picture uses a page from the Sunny Day templates, which are 8 1/2 by 11 portrait size.
Here is the 12 x 12 version.  The things I had to tweak are that I group all the page elements so I could move them up on the page.  On the larger version there was a huge orange polka dot area at the top and the main element box ( that's what I'm calling the pink area and all the things on it, such as the pictures and the flower stamps and the ribbon etc) was all the same but at the very bottom of the page.  Jillian's shoes were off the page entirely for some reason.  So, I dragged all the elements up.  Then I had to re add the white flowers at the bottom because they were gone. Maybe because they are hanging off the page in the 8 1/2 by 11 size, not sure.  But anyway, I just had to re add them and that was it.  So, now my 12 x 12 premade template page options have grown by leaps and bounds.  And my card options too!  I thought I would see what this template looked like as a card.  I took off the "Happy" and replaced it with "Happy Birthday".  I also made the green background above the jumping picture smaller. 
So, here is what it would look like as a birthday card.  Just a tiny bit of tweaking and it was all done! Love this feature!


I'll post some other great features as I get to know them!!